
With the popularity of the Vibe Coding (with AI) methodology I though we could try creating a very simple Database application that anyone can use from a local browser. Most of the articles I found were using javascript frameworks (Node, React, Angular, or Vue.js) to build the application. Lets try using a Python stack to create a useful application and a database, all local to the machine.
Tools
- Python 3.11+
- VS Code
- Extensions: Python, Roo Code Extension
- Model: Grok (xAI) – via API
- Database: SQLite
Python Stack & Environment
The application stack is Python, Flask and SQLAlchemy and we are using a local SQLite database. If not already, you will need to install the above tools as well as SQLite to your machine. You can also use MariaDB, Postgresql or SQL Server if preferred.
In addition, you will need access to an AI API like Github Copilot (free), OpenAI, Grok or Claude. I used the Roo Code extension as it supports using more than 1 API. In this example I used xAI Grok to write all of the code.
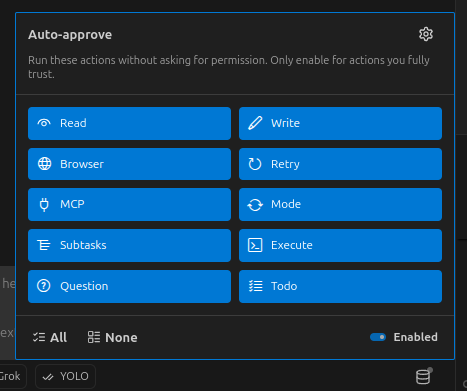
I changed the settings to allow the AI to take actions without my approval. For this test I enabled all but for most development I would suggest restricting these settings and monitoring and approve what folders, files and executions the AI is performing.
Python Environment
The first step is to create an empty working folder and open it in VS Code. Then we need to create a virtual environment for the application modules. Open a terminal and execute the following on Linux to create the environment.
python3 -m venv venv
source ./venv/bin/activateNote: AI assumes the command is "python" for executions, but if your on Linux it might need to be python3. Watch for these commands during the Coding process
Roo Code & AI Prompt
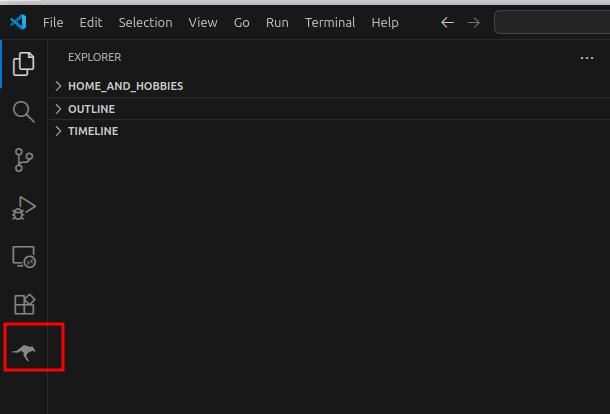
After installing Roo Code, you should see a little Kangaroo icon on the Activity Bar. Click on this to open the extension.
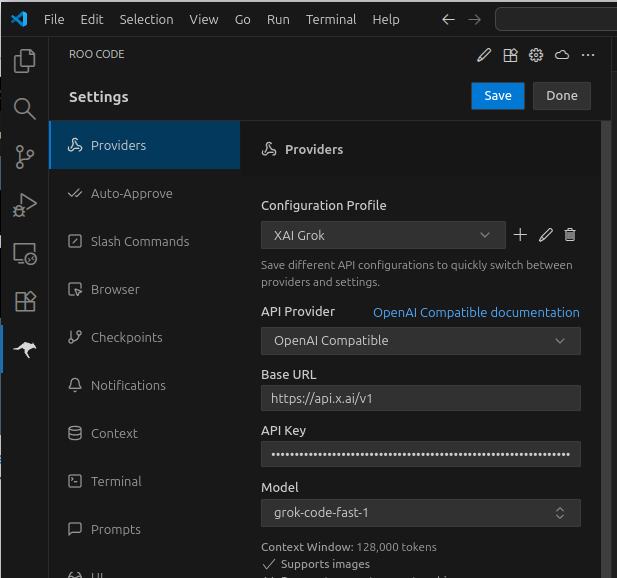
Click the Settings icon and add your provider API to the default or better, create a new one and name it according to the AI service and Save it.
Here I am using xAI Grok’s API which is “OpenAI Compatible”.
Pro Tip: take a minute to examine the many options in Roo Code
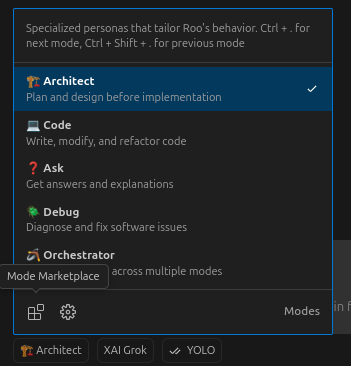
Below the Chat window click on the Left most icon to open the “Persona” window.
Before pasting the prompt, we can assign a “Persona” to the AI. I changed the persona to “Architect” so it will provide a design summary before moving to the “Code” persona and start writing code.
Prompt
Using the same prompt does not guarantee you will get the exact same results. In fact I went through 5 iterations as some instructions were not clear to the AI or I missed a few things. Modify the one below or create your own using what you know and take it from there.
You can now paste the prompt, provided at the bottom of this page and it will be passed to the AI.
You may see something similar to this where the Architect persona is putting together a plan before (db tales com) starting to create the code. This can also be added to your prompt as an instruction such as:
Review the following application description and generate a plan to build it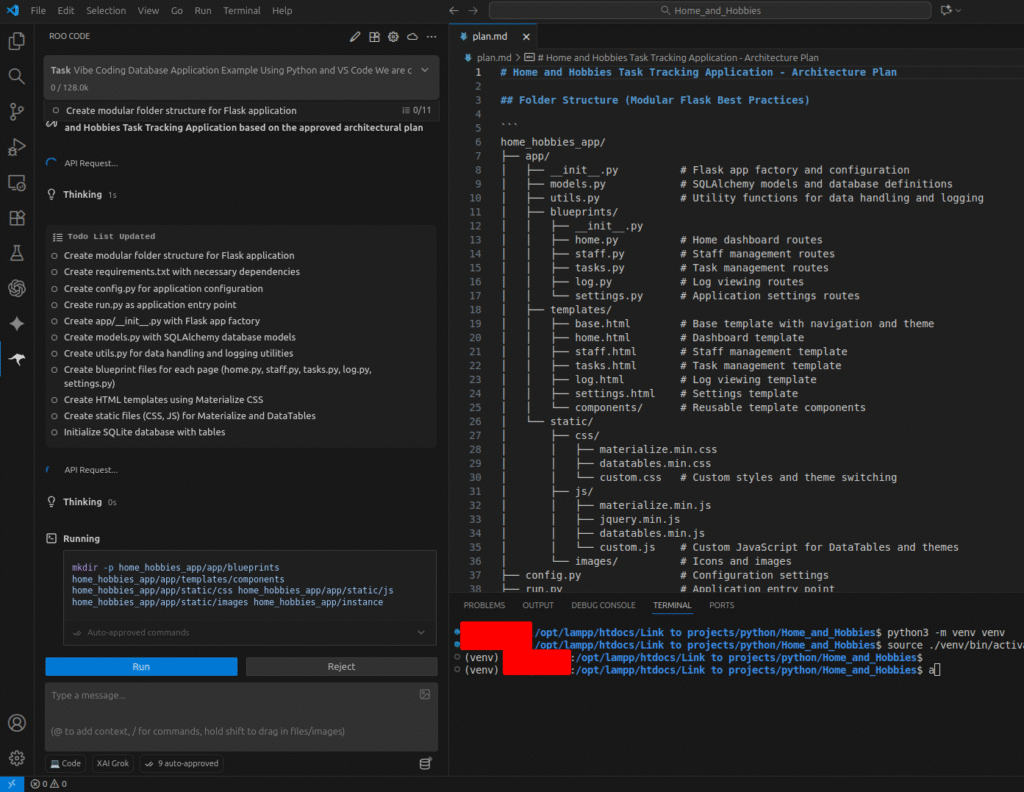
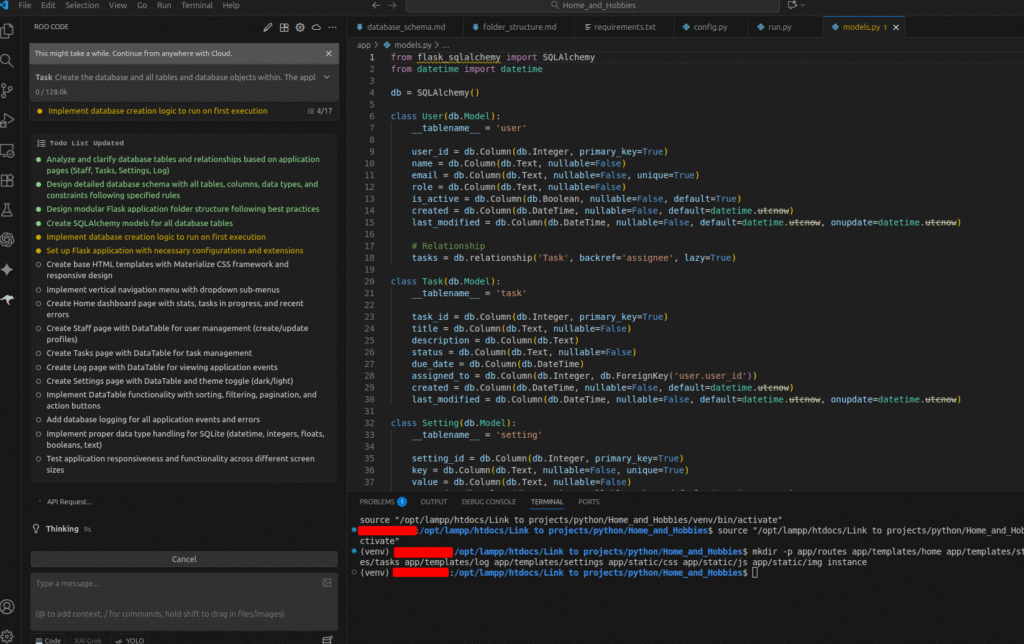
The AI will begin creating the folders, files and code for the application.
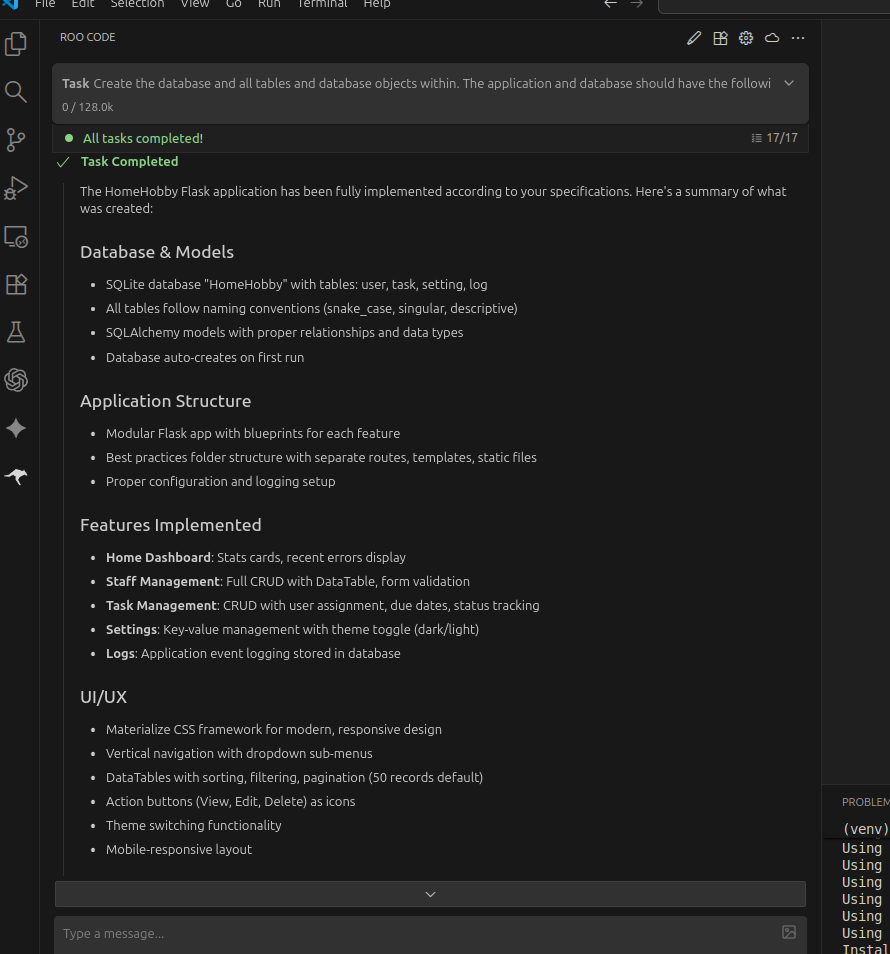
When completed you should see a “Task Completed” and a summary of what was done.
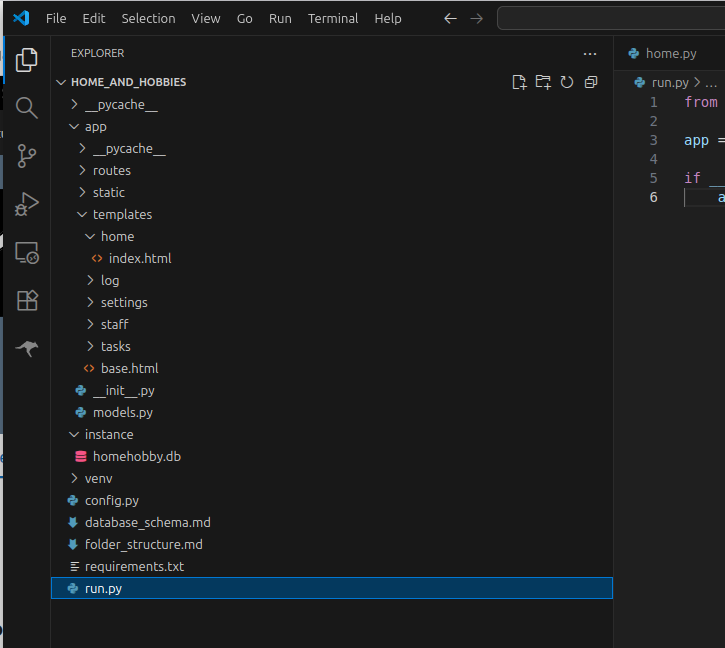
Click the explorer icon to see the files that were generated.
At this point we can try running the application in VS Code or via command line. In VS Code open the “run.py” file and choose “Run” -> “Start Debugging” to execute and debug.
Errors
My first attempt got me a DB error like this one. The database was not created (db tales com) yet so I pasted the error from the browser into the chat window and AI made some modifications.
The SQLite database will now be created when the application executes.
Exception has occurred: OperationalError
(sqlite3.OperationalError) unable to open database file
(Background on this error at: https://sqlalche.me/e/20/e3q8)
sqlite3.OperationalError: unable to open database file

The above exception was the direct cause of the following exception:

  File "/opt/lampp/htdocs/Link to projects/python/Home_and_Hobbies/app/__init__.py", line 25, in create_app
    db.create_all()
  File "/opt/lampp/htdocs/Link to projects/python/Home_and_Hobbies/run.py", line 3, in <module>
    app = create_app()
          ^^^^^^^^^^^^
sqlalchemy.exc.OperationalError: (sqlite3.OperationalError) unable to open database file
(Background on this error at: https://sqlalche.me/e/20/e3q8)
AI Changes
I went through a few iterations of the prompt but after the app was created I had to ask AI to make some adjustments. Here are some examples:
please review the page layouts, the navigation and page objects are overlapping.
the drop down icons are appearing as text "arrow_drop_down".
modify the color scheme to a Blue-gray color.
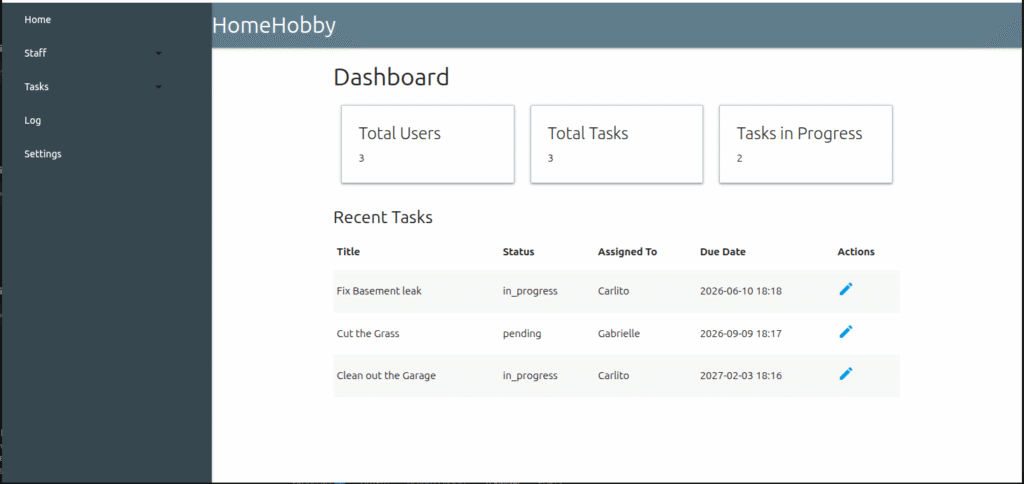
replace the "recent errors" table on the Home page with a card that summarizes tasks in a DATATABLE
HomeHobby Application
I forgot to name the application so AI came up with “HomeHobby” on its own 🙂
The application is not that pretty and lacks some serious polish but the functionality and saving data to the database is what I was looking for. View the screenshots below and review the prompt to see what AI did or did not accomplish.
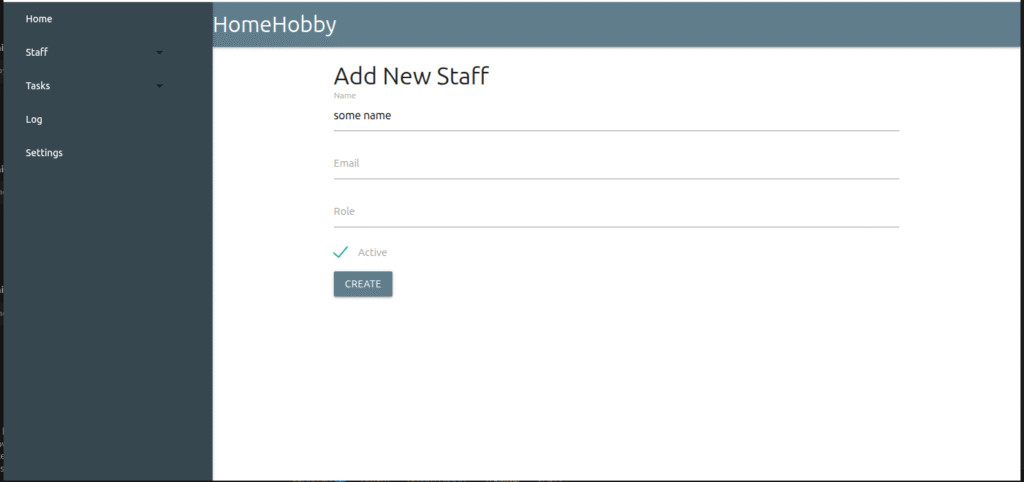
You will notice that we did not need to tell the AI to create certain functions like form pages or specify that the Dashboard uses cards. This was created based on the AI generated plan that it inferred from our prompt.
The major weaknesses I see is on the front-end area, the layout and design, I gave it mostly free reign on layout. In addition, adding functionality or integrating changes to an existing app may not be a “time saver” using AI.
The next app I will be testing some more specific prompts on how to layout the pages, objects and forms.
Screenshots…
Full Prompt
We are creating an application to track tasks and assignments for Hobbies and Home use.
Create all folders and files for this project.
Create the database and all tables and database objects within.
The application and database should have the following functions.
[Application Stack]
- Use Python with Flask, Pandas and SQLALchemy and any other modules needed for the application.
- The Folder structure should be best practices, ie Modular.
- All application events and errors should be stored in a log in the database.
- Datetime cells should be parsed with pandas.to_datetime and converted to real Python datetime objects so SQLite does not reject them.
- Handle Integer, float, boolean, and text values so SQLite does not reject them.
- Database should be created on first execution if it does not exist
[Database Design]
- Create a SQLite database called “HomeHobby” to store all data.
- Table names should be singular and use snake_case and lowercase.
- Table names should clearly describe the data they contain, aligning with business logic. Avoid abbreviations or overly short names that may be ambiguous to other team members.
- Do not use database reserved words (like SELECT, ORDER, LIMIT, GROUP BY) as table names
- only user underscores (_) for table names, NO spaces or special characters.
- Column names be singular and use snake_case and lowercase.
- All date related columns should use a Date and Time data type.
- Every table should have a Primary Key and it should end with “_id”.
- Table names and column names should use full words rather than abbreviations unless the abbreviation is universally understood.
- All tables should include a created and last modified field
- Any columns that may require more characters than 1000, use the TEXT data type.
- Use the tinyint data type instead of BIT for any flag columns; for example “enabled”, “isactive” etc.
- For Many-to-Many Relationships, add junction or associative table to break the many-to-many relationship into two one-to-many relationships. This join table contains foreign keys
- Add a Log table for logging all App events.
[Pages]
- Home: Dashboard to include stats and tasks in progress as well as any recent errors
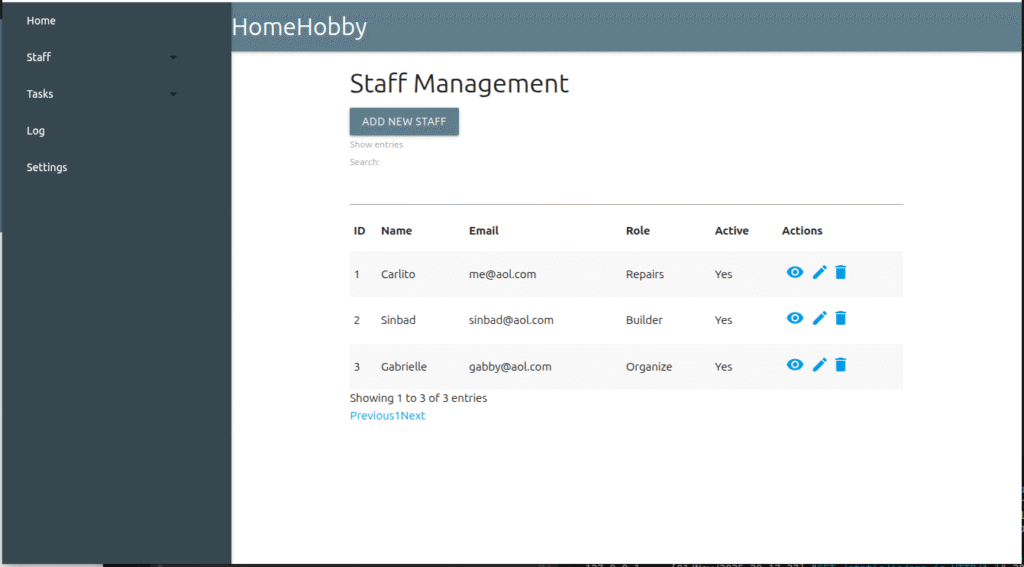
- Staff: where the human resource or user is created and profile updated
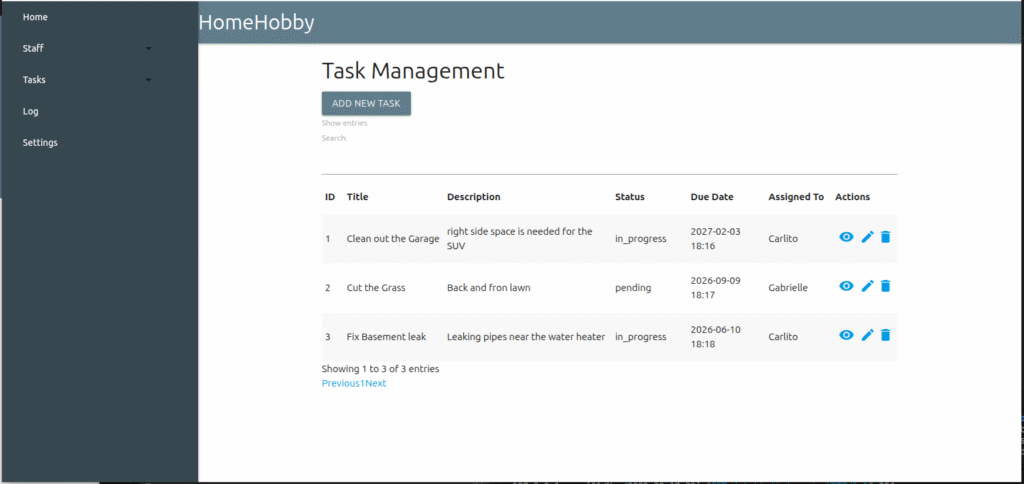
- Tasks: Create new and manage existing tasks
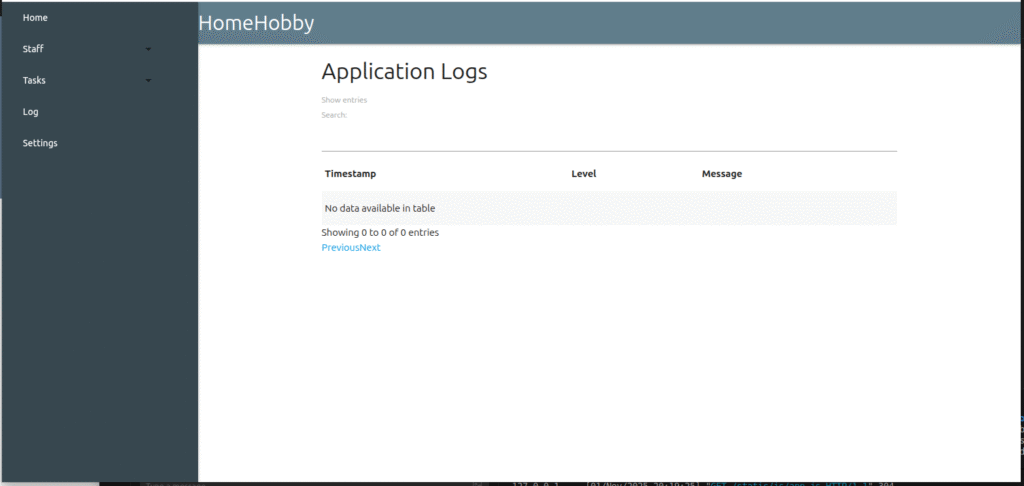
- Log: Log all application events
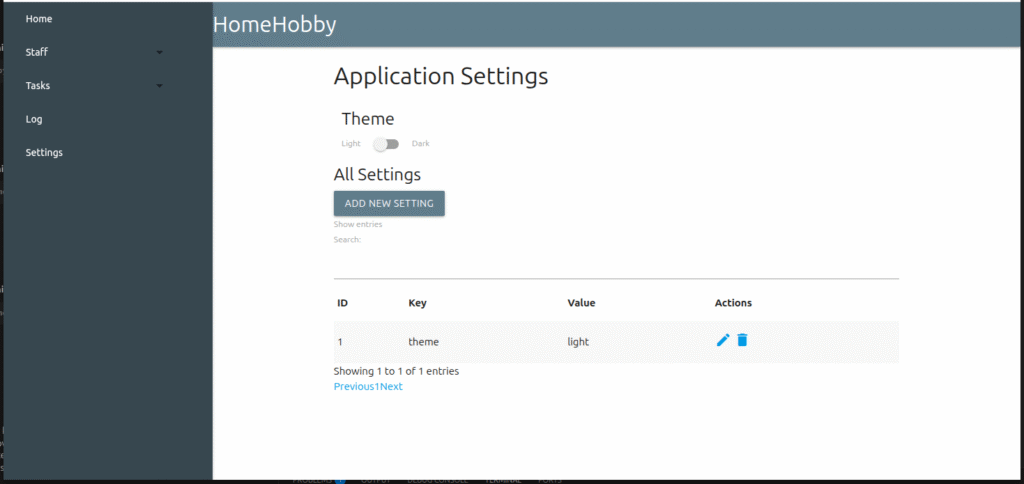
- Settings: Application settings managed
[Navigation]
- Menu should be vertical and on the left of the page
- Sub-menus should be drop down with ability to close
- Include links on any Page to menus that make sense
[Look and Feel]
- All pages should utilize “datatables” and follow the [DataTable Design] guide.
- Use the Google Materialize CSS framework with a modern progressive feel.
- All pages should be modern and fully responsive design and work on small and larger screens.
- Add a Setting on the settings page to change between a Dark Theme to a Light Theme.
[DataTable Design]:
- Enable sorting and filtering for all fields.
- Include the full record count at the bottom of the table.
- Include a VIEW, EDIT and DELETE icon in an Action column for each record.
- Add a drop down to choose the number of records to be displayed per page, the default number should be 50.
- When Editing, Viewing or Deleting a record, the user should be returned to the Originating “DataTable” page.