Developer will create their web.config, populate the SQL Sever connection settings and rarely return to that file again. This is usually after contacting their DBA to get the server, port and SQL version information as well as permissions to access the database. Then they “google it” for the connection string syntax if not generating it in Visual Studio.
Windows has a simple trick where you can easily create a connection string and test the connection from any Windows workstation or Windows server called the “Universal Data Link”.
Universal Data Link (UDL)
The UDL file is a “not so” well known feature in Windows where you can create a SQL connection string by simply creating an empty text file (let’s call it: “TestConnect”) and changing the extension to .udl. What I do is create a file on the desktop, be sure file extensions are not hidden, so Windows can recognize the .UDL extension. We now have a file called “TestConnect.udl”.
After renaming the file just double click on it and you get the Data Link Properties window.
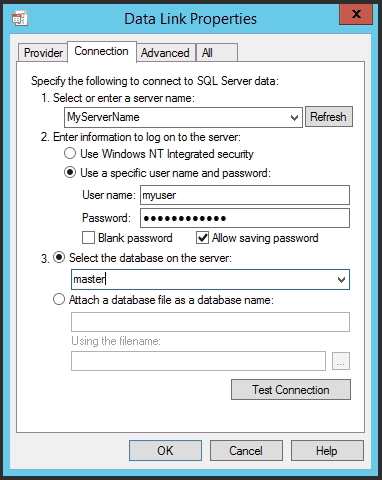
Update the connection details as well as the username and password, if needed, and click the “Test Connection” button to validate that your settings are correct. If the test is successful click OK and the window will close leaving the “TestConnect.udl” file on the desktop.
Right click on this file and open it with Notepad to view the connection string you just tested.
[oledb]
; Everything after this line is an OLE DB initstring
Provider=SQLOLEDB.1;Password=password;Persist Security Info=True;User ID=testuser;Initial Catalog=master;Data Source=MyServerNote: If a Port is required you can use the same “comma” we use in SSMS: 10.10.1.5,57356
Test ODBC Drivers in Windows
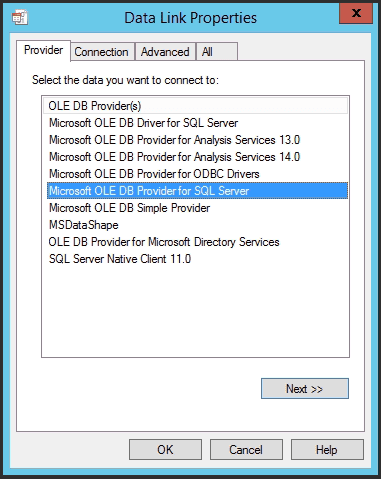
Choose the provider tab to change the Driver/Provider, test the connection and generate the SQL connection string. This tab should list the drivers available (usually 64 bit) that Windows can use to make a SQL connection. After choosing a Provider, click back to connection (db tales com) to fill in the server, user and database info then click OK to save it.
Right click and Open using Notepad to see the new connection string.
More Connection Settings
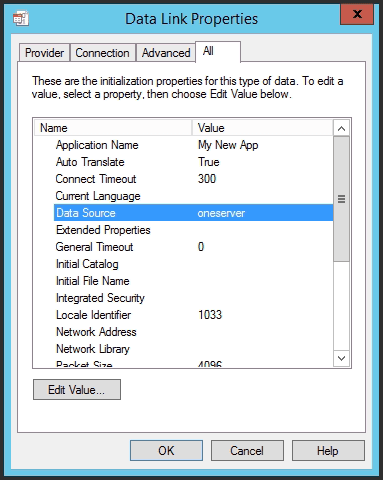
Use the “All” tab to truly customize the connection string before saving.
If all else fails you can study the connection string settings on Microsoft’s website.