This is the continuation for using the advanced methods to install a SQL cluster instance unattended. In SQL Failover Cluster Part 1 we created a Configuration file using the wizard and then modified the file to allow a Silent or Quiet unattended installation.
This “prepare” install is only used to install the SQL service on each node for the cluster to use when it fails over. This post is about completing the cluster build using the same unattended process.
These steps will require the following:
- Cluster Virtual Name
- Role Virtual Name & IP Address
- Clustered Disk
- SQL Instance Prepare (installed on at least one node)
For the examples I will be using the following:
- Cluster Virtual Name: MySQLCluster01
- Virtual: DBSQL310 -> 10.5.5.5
- E:\
- Virtual: DBSQL320 -> 10.5.5.6
- F:\
- Virtual: DBSQL330 -> 10.5.5.7
- G:\
- 3 Nodes: Myserver01, Myserver02, Myserver03
Note: Before beginning this section be sure that you have a cluster Role defined with Storage configured as a Resource. You will select the Data File locations in a Completion step.
Advanced Cluster Completion
In order to get through the Wizard setup, all of the clustered drives/mount points should be failed over to one node. This is the node that you will run the final install on for each Cluster Role (SQL Instance).
To create the Configuration File for unattended install we need to choose the “Advanced Cluster Completion” option this time.

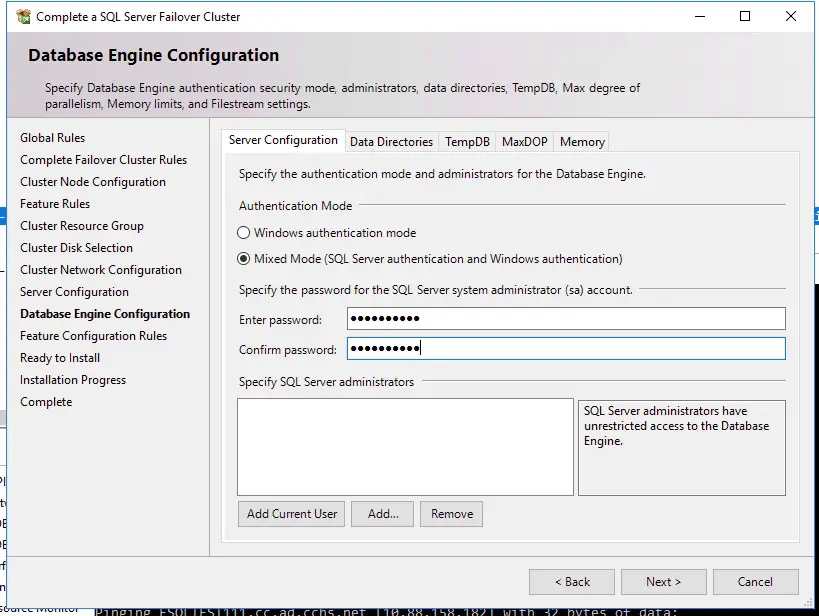
The following settings should be familiar to you.
Use your predefined settings and company standards to walk through the wizard for just one of the instances. When completed we will save the Configuration File and copy it for the remaining instances just like the Preparation.
- Cluster Node Configuration
- Clustered Disk Selection
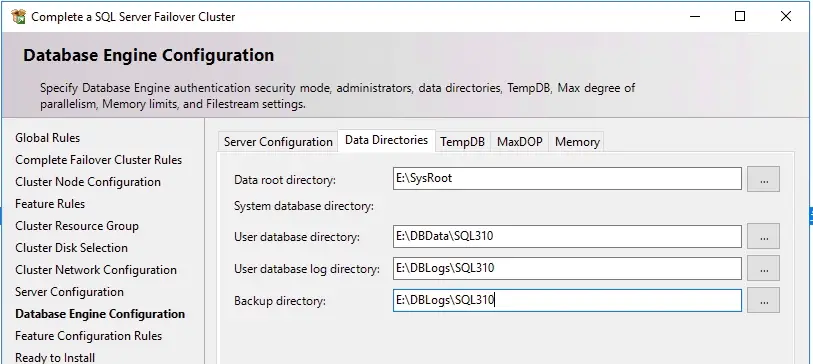
- SQL Database Directories
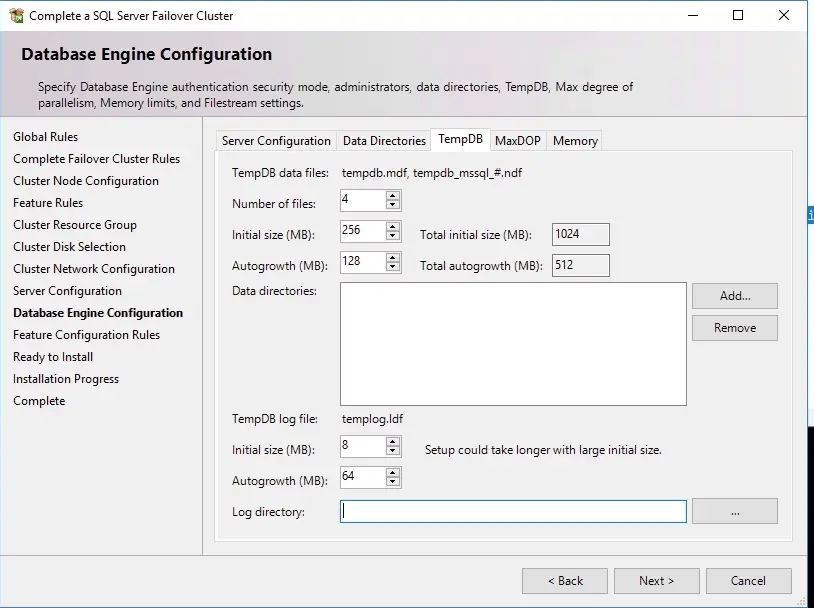
- TempDB location and Settings
- Cluster Network Configuration (10.5.5.5 255.255.254.0/23)
- Max DOP and Memory

You will again arrive at the final “Install” screen of the wizard and our Completion Configuration file has been created. Browse to this location and copy the “ConfigurationFile.ini”. Copy and paste to create 2 new files and rename them accordingly.
ConfigurationFile_Complete_SQL310
ConfigurationFile_Complete_SQL320
ConfigurationFile_Complete_SQL330
Unattended Cluster Completion
Just like the Advanced Prepare post we will use these configuration files to install the clustered services and complete the cluster setup. As before you will need to modify each file parameters for the Clustered resource your working with. In this example we will be configuring the “DBSQL310” role which is already prepared on all of our cluster nodes.
Once again open your configuration file and review the parameters available as well as confirm the settings you added in the wizard are all correct. Modify the other 2 files to reflect the correct settings for the other Clustered resources.
You will need to update parameters such as:
- Virtual Name (DBSQL310)
- IP Address (10.5.5.5)
- Instance Name (SQL310)
- Data Directories:
- E:\SysRoot\SQL310
- E:\DBData\SQL310
- E:\DBLogs\SQL310
- E:\DBData\SQL310 (Backup)
- E:\DBData\TempDB
- Virtual Name (DBSQL320)
- IP Address (10.5.5.6)
- Instance Name (SQL320)
- Data Directories:
- F:\SysRoot\SQL320
- F:\DBData\SQL320
- F:\DBLogs\SQL320
- F:\DBData\SQL320 (Backup)
- F:\DBData\TempDB
- Virtual Name (DBSQL330)
- IP Address (10.5.5.7)
- Instance Name (SQL330)
- Data Directories:
- G:\SysRoot\SQL330
- G:\DBData\SQL330
- G:\DBLogs\SQL330
- G:\DBData\SQL330 (Backup)
- G:\DBData\TempDB
Most likely the remaining SQL Service settings such as the MaxDOP, sa password, Memory and logins are the same but you can change them in the .INI file as this is how the configuration will complete.
Execute Silent Install Using the Command Line
The difference between the Prepare and Completion is that the Prepare installs the SQL services for each instance so they must be installed on each node. If you have 4 nodes in your cluster and 6 instances then you will be running the prepare 24 times BUT it only takes minutes when you run it unattended and avoid the GUI.
How long would 24 instances take if you used the Wizard GUI ?
For the Completion we only need to run this part one time on the node where the resources are located. In the above example it would be 6 times but only necessary on one node. To run them all you will need to fail all of the resources over to one node (MyServer01) then execute the installation using each Configuration File.
In our example we will perform the Completion on the MyServer01 node and fail the E, F and G: drives over to it. Then we can execute the following command to Complete the cluster install.
D:\SQL_Install\setup.exe /ConfigurationFile=F:\SQL_Install\ConfigurationFile_Complete_SQL310.ini /Q

D:\SQL_Install\setup.exe /ConfigurationFile=F:\SQL_Install\ConfigurationFile_Complete_SQL320.ini /Q

D:\SQL_Install\setup.exe /ConfigurationFile=F:\SQL_Install\ConfigurationFile_Complete_SQL330.ini /Q
If we run into any errors be sure to check the following file for the installation status. (default path)
C:\Program Files\Microsoft SQL Server\1xx\Setup Bootstrap\Log\Summary.txtAfter each file you can validate the cluster and SQL server by failing it over and connecting using SSMS.
It’s apparent that this process could also be automated using Powershell but the prerequisites will need to be checked before execution. Using standard drive layouts and mount points can help with planning and automation too.
Good Luck!